Monday, June 13, 2016

Clean uninstall of EPM V11.1.2.4

1.  Begin with uninstall

 All Hyperion folks know it clearly that dealing with Hyperion setup will require knowledge about uninstalling Hyperion suite completely.
As it is pending from a long time after we started with Hyperion v11.1.2.4, here are basic steps to follow to uninstall Hyperion EPM V11.1.2.4


Uninstall using same admin credentials with which we have installed Hyperion EPM V11.1.2.4

2.  Uninstall related software

EPM uninstaller uninstalls JRE which comes with EPM installer. It is used for installation and configuration of any Hyperion products. The same JRE is used to uninstall related non-Hyperion software components like weblogic, OHS. So, if we proceed for EPM V11.1.2.4 uninstall, we cannot uninstall related software components by proper procedure and so we might end up in option of deleting folders and cleaning related stuff.

Thus, it is very important to follow following steps before uninstalling EPM V11.1.2.4.

Uninstall Weblogic

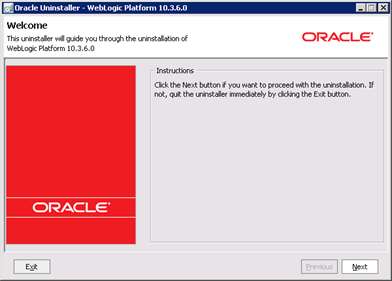
Run WL Uninstaller separately


Uninstall OHS


Run OHS Uninstaller separately


Uninstall Oracle Application Developer

Run Oracle Application Developer uninstaller separately

 Once we uninstall above products, check if the respective directory is removed from MIDDLEWARE_HOME.

3.  Uninstall Oracle EPM V11.1.2.4

Uninstall EPM System V11.1.2.4
Stop all Hyperion and Oracle services

Uninstall Hyperion EPM system by running "uninstall.bat" located at "MIDDLEWARE_HOME\EPMSystem11R1\uninstall"


Once the uninstall is complete, the directory "MIDDLEWARE_HOME\EPMSystem11R1" should be removed.

4.  Post uninstallation tasks

Check shortcuts

 Shortcuts should be removed.

Check from Start--> All Programs, all related shortcuts should have been removed.

Windows Registry

Check under Windows registry in HKEY_LOCAL_MACHINE > Software and HKEY_CURRENT_USER > Software whether the Brio > Hyperion > Oracle keys have been removed correctly.

Search registry and remove all the keys with keyword "Hyperion" or "Brio" or "Oracle"
With Oracle keyword, there will be keys for Oracle client which is installed as pre-requisite of EPM System.

Environment Variables

Following environment variables are created while installing hyperion EPM system and should be removed after uninstalling EPM system.
ARBORPATH
EPM_ORACLE_HOME
ESSBASEPATH
HYPERION_HOME
To confirm removal of environment variable, first check if the variable is still present.

If the environment variable is still present, delete it as below.

PATH variable
Check the PATH variable and delete any portions that need to be removed.


Manual File Deletion

Manually check the file system to see if any files or folders have been left behind. If any of these are left behind, they need to be removed manually.

    Ensure that <system drive>\Documents and Settings\<install_user>\.oracle.instance file has been deleted.
    Ensure that .oracle.products file in Middleware_Home\EPMSystem11R1 has been deleted.
    Remove any files left in the existing HYPERION_HOME if this location is to be re-used.
    Delete any BEA folder on the file system.
    Delete or rename installer records in C:\Program Files\common files\InstallShield\* if no other programs installed by this tool remain.
    Check for Oracle EPM related entries in the inventory.xml file located in C:\Program Files\Oracle\Inventory\ContentsXML and remove these entries from the file.

    Clean up any remaining Hyperion-related files and directories under the user's install home. E.g. "D:\Oracle\Middleware"
Registry keys deletion
Registry keys which should be deleted:

    HKEY_LOCAL_MACHINE\software\wow6432node\oracle\
    Delete any additional 'dds_proxy' settings in the registry.
    Delete any additional 'arborpath' entries in the registry.
    Delete any additional 'hyperion' entries in the registry.

Reboot the system

Please reboot the server after all the steps in the uninstallation have been performed.


Tuesday, January 5, 2016

Hyperion Planning Application Shell

1.  Hyperion Planning Application

Once Hyperion Planning is installed and configured properly, we should move to creating Planning application with following steps.

Planning Group in Shared Services

Application groups are the place holders for the applications which we create. Its intent within Shared Services is to organize registered applications and make Shared Services aware of applications for user/group provisioning. If an application is not registered with Shared Services, it cannot assign users or groups to it.
The created Applications might be Essbase application, Planning application or even HFM, which is in the suite of Oracle Enterprise performance management.
To simplify, application groups are like folders, we can have a folder named 'Planning' which is exclusively meant only for Planning applications i.e. a new application group with the name 'Planning'. So we can create a new folder, that is a new application group with the name 'Planning' and select Planning as the application group for each Planning Application.

Before creating application, we need to have application group – Planning in Shared services.
Login to Shared services using admin credentials, under Application groups, create New application group  à Planning.


Planning Application Creation

1.     Pre-requisites

DB Schema

We require Oracle DB schema with appropriate privileges of DBA.
We have already got DB schema – “SBOX_PAWS_PLN2” created on DB QPAWS.

Hyperion Planning Related Services

Ensure that all the services of Hyperion Planning are up and running.

User with required roles

We need to assign "Application creator" and "Dimension editor" roles for a user to create a Planning application.
In our case, we are going to use 'admin' as the user, who already has these provisions.
To cross verify whether the user 'admin' has the roles of 'Application Creator' and 'Dimension Editor'.
Login to shared services.

Native Directory à Users à Right click Admin à Provision

Expand Shared Services under Selected Roles. As we could see, the admin user is already an Administrator along with having the needed Dimension Editor and Application Creator roles assigned to him.
 

2.     Application Shell

Before creating application, we require application shell to be present.
To create Hyperion Planning application, go to Planning wizard.
But in my current project, I am using default port i.e. 80 for Planning wizard. Thus I am accessing wizard using following URL


Once we login to Planning Wizard, we will be at following screen.


Manage Data Source

Click on Manage Data source
Click on create Data source à Enter following details.
Once the database and essbase connections are validated, click on Finish.

Application shell creation

When we click on Create à It takes us to create application screen.


In the very first tab of Select, we need to provide the following information:
·         Data Source: It's a drop down, where we need to select the Relational data source. In our case, we had already created a data source by name 'TEST_PAWS’, which we should be able see. As it's the only data source we had created so far, we see only one and it is selected by default.
·         Application: Here, we can use our own creativity to name our first Planning application. We'll stick to name as PAWS.
·         Application Description: As it's understood, it's the description of the Planning Application. We can use any description we wish.
·         Shared Services Project: We know by now that Shared Services is used for user management and we will use the Application Group 'Planning' created as a part of pre requisite earlier.
·         Instance: Leave this set to the default. We have not created any instance. The default Planning instance is created as a part of Planning Configuration using EPM Configuration after installation.
·         Calculation Module: In a Planning application, we need to incorporate the logic for allocation computation, revenue calculation, expense calculation, balance sheet computation, and so on. We employ either calculation manager or business rules for that. These are simple calculation scripts that we write to take care of the business logic. Calculation manager is a new addition to EPM architecture. Let's stick to the old one, business rules.
Select data source we have just created – PAWS
Enter application name à PAWS
Select shared services project à Planning
Instance àDefault
Application Type à General
Calculation Mode à Business Rules

Calendar

Next à Enter Calendar details

The Calendar tab is responsible for two standard dimensions;
·         Year
·         Period
Year dimension would have the Fiscal Years and Period dimension would have the base time periods. Examples of period are quarters, months, and even days.
·         12 months: This is the most commonly used period. Selecting this option creates both quarters and months (12) in the Period dimension. As planning and budgeting activity of a typical organization would involve both quarters and months. This is the most prevalently used.
·         Quarters: By selecting this option, our Period dimension will have only quarters: such as Quarter1, Quarter 2, and so on, without month members.
·         Custom: To cater to more varied requirements, we can customize the periods further by selecting Weeks or Daily. Hence 'Custom' gives us the freedom to select either Weeks or Daily.
When you select 'Custom', you need to select two options as per the requirement
°°Prefix: We need to either type 'Week' or 'Day' here.
°°Periods per year: How many weeks or days can be determined by what number is given here. This field determines how many custom members need to be created for a single calendar year. For example if we are creating weekly base time periods, the periods per year will be set equal to 52 as there are approximately 52 weeks in an year.
These two are not editable unless we select the Custom option.

On the right-hand side of the following image, we have to enter information for starting fiscal year, month, and also the total number of years. This information will determine our Year dimension.

Weekly distribution – distribution of weeks among 3 months in a quarter.
E.g. 5-4-4 weekly distribution = the first month of a quarter has five weeks, the second month has four weeks as does the third month. The same pattern of five weeks for the first month, and four weeks for second and third months would repeat for the rest of the quarters too.

The total number of years is also important, which directly reflects how many years of plan the organization would prefer or number of years whose data the Planning Application will hold.
Total number of years can be changed by adding more years even after application creation. It should be noted that Start Year can never be changed after application creation.
Select Next to see Currencies tab:

Currencies


In this section, we are going to set the default currency and we will decide if the Planning Application is going to support multiple currencies and select the options appropriately.

The settings of default currency and 'Support multiple currencies' cannot be revoked after application creation. We need to think carefully before making a selection.

Plan Types

A plan type is a kind of a Planning model; technically, it's an Essbase cube.

Each Hyperion Application creates a corresponding Essbase Application. For each of the selected plan types an Essbase database is created. The names of the Essbase Application and databases are the same as those of Hyperion Planning Application and plan types.
When we create a Planning Application, we select and name the plan types to be created as part of the application.
We can have as many as three plan types in an application in addition to the plan types required for the separately licensed Planning modules.


Finish


Once the application is created successfully, logoff from planning wizard.


Tuesday, September 29, 2015

Hyperion Planning Basics

It has been a long time I am planning to learn Hyperion Planning. But as a typical technical person, could not do it until I started working on Hyperion Planning project for one of the clients.
To summarize my understanding, I will be updating my blog with Planning knowledge step by step.

This very first article is about Hyperion Planning Basics.

What is Planning

Oracle Hyperion Planning is defined as a Web-based planning, budgeting, and forecasting software.
The process of preparing for the future is planning. Planning is the set of activities to achieve goal in preparing the future.

Planning Types

As a part of planning, generally, an organization has two types of plans:
·         Strategic planning: A strategic plan includes the goals and objectives of an organization. It looks into its current business and aims by setting goals of what it wants to be in future. It includes a comprehensive strategic plan of how to achieve and it is at a very high level of an organization.
·         Operational planning: This is a set of detailed guidelines or a detailed plan to be executed to achieve the strategic plan. This planning involves the granular details of setting the responsibilities of people, departments and divisions. Hence, it's rightly called 'operational'.

What is Budgetting

Budgeting in an organization is planning how to spend money or how to allocate money to different departments or divisions.
Therefore, we can say that budgeting is a part of planning and without budgeting the planning cannot be successful in achieving the organizational or strategic goal.

What is Forecasting

Forecast is to predict the future. We make few assumptions about the future, which is called forecasting.
Conclusively, forecasting acts as a prerequisite to planning and budgeting is a part of planning activity. These three activities are intertwined but yet they are different.

Budgtting software – Oracle’s Hyperion Planning

Many organizations use Spreadsheets for budgeting. But Excel has some disadvantages like time taken, data integrity, cost, scalability and adaptability.
Oracle Hyperion Planning is defined by Oracle as a centralized, Web-based planning, budgeting, and forecasting solution that drives collaborative, integrated, event-based planning processes throughout the enterprise.

Planning Architecture


When we want to go for implementing Oracle’s Hyperion Planning solution, we need to purchase Planning software from Oracle. It is available in 3 packages.

Oracle Planning Product Architecture

Broadly, Planning Product Architecture is divided into three layers, shown as follows:

  1. Client Layer – End users connect via a web browser or Microsoft Office
  2. Web layer – the web layer provides the web content to end users
  3. Application layer – the application layer contains all of the intelligence and performs all of the processing
  4. Database layer – the database layer stores the data, metadata, web components, etc.
    DB layer has two kinds of DB – RDBMS and Oracle Essbase

Oracle Hyperion Planning Process Flow


Depending upon the operation performed in the Planning application, the information is stored or retrieved from a Relational source such as metadata or security information and/or from Oracle Essbase as shown in the following image:

Oracle Hyperion Planning Solution Architecture

Oracle Hyperion Planning solution includes following additional products
·         Oracle Data Integrator (ODI)
·         Financial Data Quality Management (FDQM)
·         Oracle Business Intelligence (OBI)
·         Hyperion Web Analysis
·         Hyperion Financial Reporting

EPM


Thursday, July 30, 2015

Extracting Data file from HFM application

Here comes the situation.
I set up a new DEV environment for HFM. After installation and configuration was done, I was required to get current application in DEV.
First, application profile is created via HFM desktop client. Please refer following article to create application profile.
http://evolvewithhyperion.blogspot.in/2015/07/creating-application-profile-for-hfm.html

Then, through workspace, HFM application is created.

After we create an application, we load application elements like metadata, member lists, rules, and security files. 
Now, we can load multiple files and then the system loads files in proper sequence.

But if we are loading individual application elements, we need to load them in proper sequence given below:
1) Security
2) Metadata
3) Member Lists
4) Rules

There are many different ways to load application elements but here we are loading using extract and load tasks from workspace.


  • Application security
In workspace, open application.
Administration --> Extract tasks --> Extract Security.

Save the security file at required location.
Load security to new application from load tasks.


  • Application Metadata
1.
From Extract Tasks, select Extract Metadata.


2.
In the Delimiter Character text box, enter the character to be used i.e. “;” – semicolon  to separate the metadata in the file.


3.
Select the Financial Management Application Format checkbox to extract the file in APP format. Clear the Financial Management Application Format checkbox to extract the file in XML format.


4.
Select the types of metadata to extract and click Extract.


5.
In the Download Instructions, click the Click here to download link.


6.
Click Save.


7.
Browse to your backup location. In the "Save as type" list, select All Files and click Save.
8.
Navigate to your backup location and verify that the APP extract file was saved and provide this extract file with app extension.


Wednesday, July 29, 2015

Creating Application profile for HFM application

1.      Application profile introduction

Application profile is like base of application in Hyperion Financial Management.
Before creating any application, we need to create application profile file (.per) and then we can use this file to create any number of applications.
Following 4 dimensions are defined in Application profile. We can not change these dimensions further for application.
·         Period
·         Year
·         View
·         Custom

Application profile can be created only through desktop HFM client in all versions.

In v11.1.2.3, Desktop HFM client has only one functionality of creating application profile and managing metadata. All other functions like creating application, loading data, metadata etc are performed through web client.

2.      Profile creation

Open desktop HFM client and login using credentials.

 From left side menu à Application à Define application profile

 Create a New Application Profile

On the second screen, specify languages used in application. We are using English language in our application.


On the third screen, specify Period and Year dimensions.

On the fourth screen, frequencies of periods are mentioned.

On the fifth screen, our selection for dimensions View, Year, Peroid is displayed.
On the last screen, profile is saved at required location.

This profile file is saved and used while creating HFM application.
Same profile file can be used to create any number of HFM applications.